

Assets
Transforming Images with Query Strings and Focal Point
Every asset in Agility is served over a CDN. Images can be resized, optimized and reformatted without having to re-upload it. You can use query strings to manipulate and generate different sizes and thumbnails of your images. This is also known as image transcoding.
What is it and what are the benefits?
There are many instances where an image will need to be displayed across multiple devices with different size restrictions. Agility allows developers to make this request directly in the code through Media Based URL Transcoding.
How Does it Work?
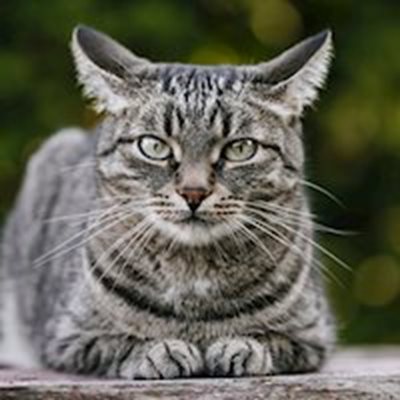
Let’s use this picture of a cat as an example and say you’ve uploaded it to Agility and the URL for the image is https://cdn.aglty.io/agility-cms-docs/images/cat

A Developer could use the Width and Height parameters below to alter the URL and specify that the Image needs to be displayed with a Width and Height of 200 pixels. The URL they would use is https://cdn.aglty.io/agility-cms-docs/images/cat?w=200&h=200
*Note: In Agility we always use "w" and "h" in our focal point code instead of the full words "width" and "height", which you can see outlined in the URL above.
Available Parameters
- w – Allows you to specify the Width of an image with a number value
- h – Allows you to specific the Height of an image with a number value
- c – Allows you to specify an Action for the image to take with a number value of: 1: Scale and fill remaining space, 2: Resize and fill with white space, or 3: Crop Image. If not specified, the default will be 1.
- q – Allows you to specify the Quality of an image as a percentage (1-100) of the original Asset quality
- format=auto – Allows the source image to be converted to the best format for the browser (webp or avif)
Focal Point
If you have an image that needs to be cropped around a non-center focal point, you can use the image editor to choose that focal point. Then, if you provide a height (h) and width (w) parameter to that image's URL, it will center around the focal point and not the center of the image itself.
As an example, let's look at this image where the person has been offset:

If we do not choose a focal point, the default 200x200 crop of that image will look like this (https://cdn.aglty.io/agility-cms-docs/images/joel-wide.jpg?w=200&h=200):

However, once we set the focal point on the face, the default crop performs much better (https://cdn.aglty.io/agility-cms-docs/images/joel-focal.jpg?w=200&h=200):

Setting a Focal Point
In order to set a focal point on your image, do the following:
Navigate to your assets in Agility and click Edit on the picture you wish to use Focal Point on. Your Edit window will look similar to this:

Click "Edit" in the bottom right and you will be brought to the Image Editor pictured below.

To set your focal point, click the "Focal Point" button. You will see the button turn purple and change to "Set Point". From here, use your mouse to click on the area of the image you want the Focal Point to be. Once set you will see a crosshair icon appear on the image, denoting where you have chosen the focal point to be set.

Click "Set Point". This will lock the Focal Point crosshairs in place.

Click" Save".
Your Focal Point is now set!
Advanced Query Parameters
Agility uses Fastly for image optimization, and supports the following additional query parameters:
- auto: Enable optimization features automatically.
- bg-color: Set the background color of an image.
- blur: Set the blurriness of the output image.
- brightness: Set the brightness of the output image.
- canvas: Increase the size of the canvas around an image.
- contrast: Set the contrast of the output image.
- crop: Remove pixels from an image.
- disable: Disable functionality that is enabled by default.
- dpr: Serve correctly sized images for devices that expose a device pixel ratio.
- fit: Set how the image will fit within the size bounds provided.
- format: Specify the output format to convert the image to.
- frame: Extract the first frame from an animated image sequence.
- height: Resize the height of the image. (In Agility use "h")
- level: Specify the level constraints when converting to video.
- metadata: Control which metadata fields are preserved during transformation.
- optimize: Automatically apply optimal quality compression.
- orient: Change the cardinal orientation of the image.
- pad: Add pixels to the edge of an image.
- precrop: Remove pixels from an image before any other transformations occur.
- profile: Specify the profile class of application when converting to video.
- quality: Optimize the image to the given compression level for lossy file formatted images.
- resize-filter: Specify the resize filter used when resizing images.
- saturation: Set the saturation of the output image.
- sharpen: Set the sharpness of the output image.
- trim: Remove pixels from the edge of an image.
- width: Resize the width of the image. (In Agility use "w")
Further Reading
There are times when images need to be used across devices with different size restrictions. Instead of creating multiple image fields for each image size, Agility provides a way for developers to request a specific image size from an image asset in their code.
Agility offers Media URL Based Transcoding which provides the ability for images that are stored in Agility Media to be transformed into thumbnails via a URL request.
To retrieve a thumbnail from your image, first upload an image to your Agility Assets Manager:
Select an Image
Get the image URL by left-clicking the image and clicking on 'Copy URL'.
Select an Image
For my example, the URL for the image is returned as: https://42b6f927-cdn.agilitycms.cloud/cat.jpg
Parameters
To transform the image we have the following parameters available:
W - Width
The w parameter sets the width of the image, expects a number value.
H - Height
The h parameter sets the height of the image, expects a number value.
C - Action
The c parameter performs an action on the image, expects one of the number values listed below:
- 1
- 2
- 3
Q - Quality
The q parameter sets the quality of the image as a percentage of the original asset, expects a number between 1 - 100.
Format - Format
The format parameter enables the source image to be converted from one encoded format to another.
- auto
Examples
Set width of thumbnail (scales height automatically according to native ratio)
https://42b6f927-cdn.agilitycms.cloud/cat.jpg?w=200
Crop image to 200x200
https://42b6f927-cdn.agilitycms.cloud/cat.jpg?w=200&h=200
Scale image to 200x200 and fill remaining space
https://42b6f927-cdn.agilitycms.cloud/cat.jpg?w=200&h=200&c=2