

Introduction
Importing and Exporting
Overview
The Import and Export tool facilitates bulk data transfer for Content lists, enabling straightforward export, editing, and re-import processes. It supports a wide range of use cases including bulk editing, translation, locale replication, and new content creation.
Export Functionality
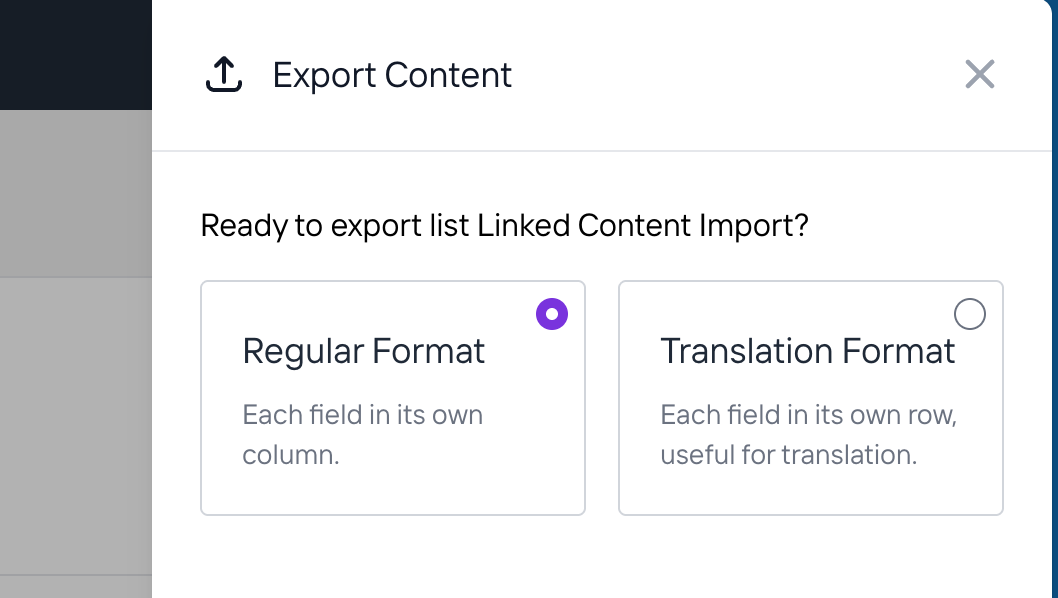
Two format options are available when exporting:
Regular Format — Exports the entire content list with each content model on a separate Excel worksheet, resembling database tables. Use this format when you want to bulk edit content within the same locale, replicate content across regional variants, or create new content items via import.
Translation Format — Exports a single-sheet Excel file with one row per field, per item. A "Translated Value" column is included where different language versions can be entered. Use this format when you want to translate content from one language to another. Note: this format includes text fields only — dates, URLs, and non-text fields are excluded, which prevents accidental translation of those values.
Export Steps
- In Agility CMS, navigate to the content list you want to export.
- Click the 3-dot menu and select Export.
- Choose your format — Regular Format or Translation Format.
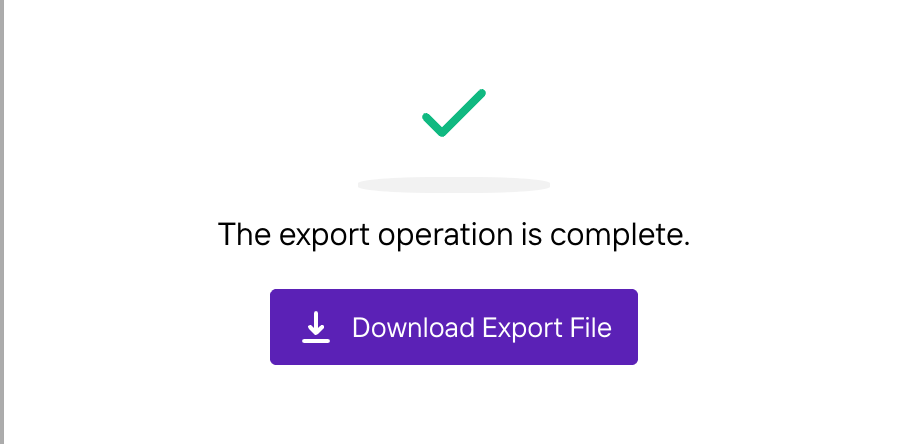
- The file will download as an Excel (.xlsx) file.
Important: Exports always include the entire content list. You cannot select specific rows to export. However, you can delete unwanted rows from the Excel file before re-importing — this will not delete those items from the CMS.
Import Process
Requirements
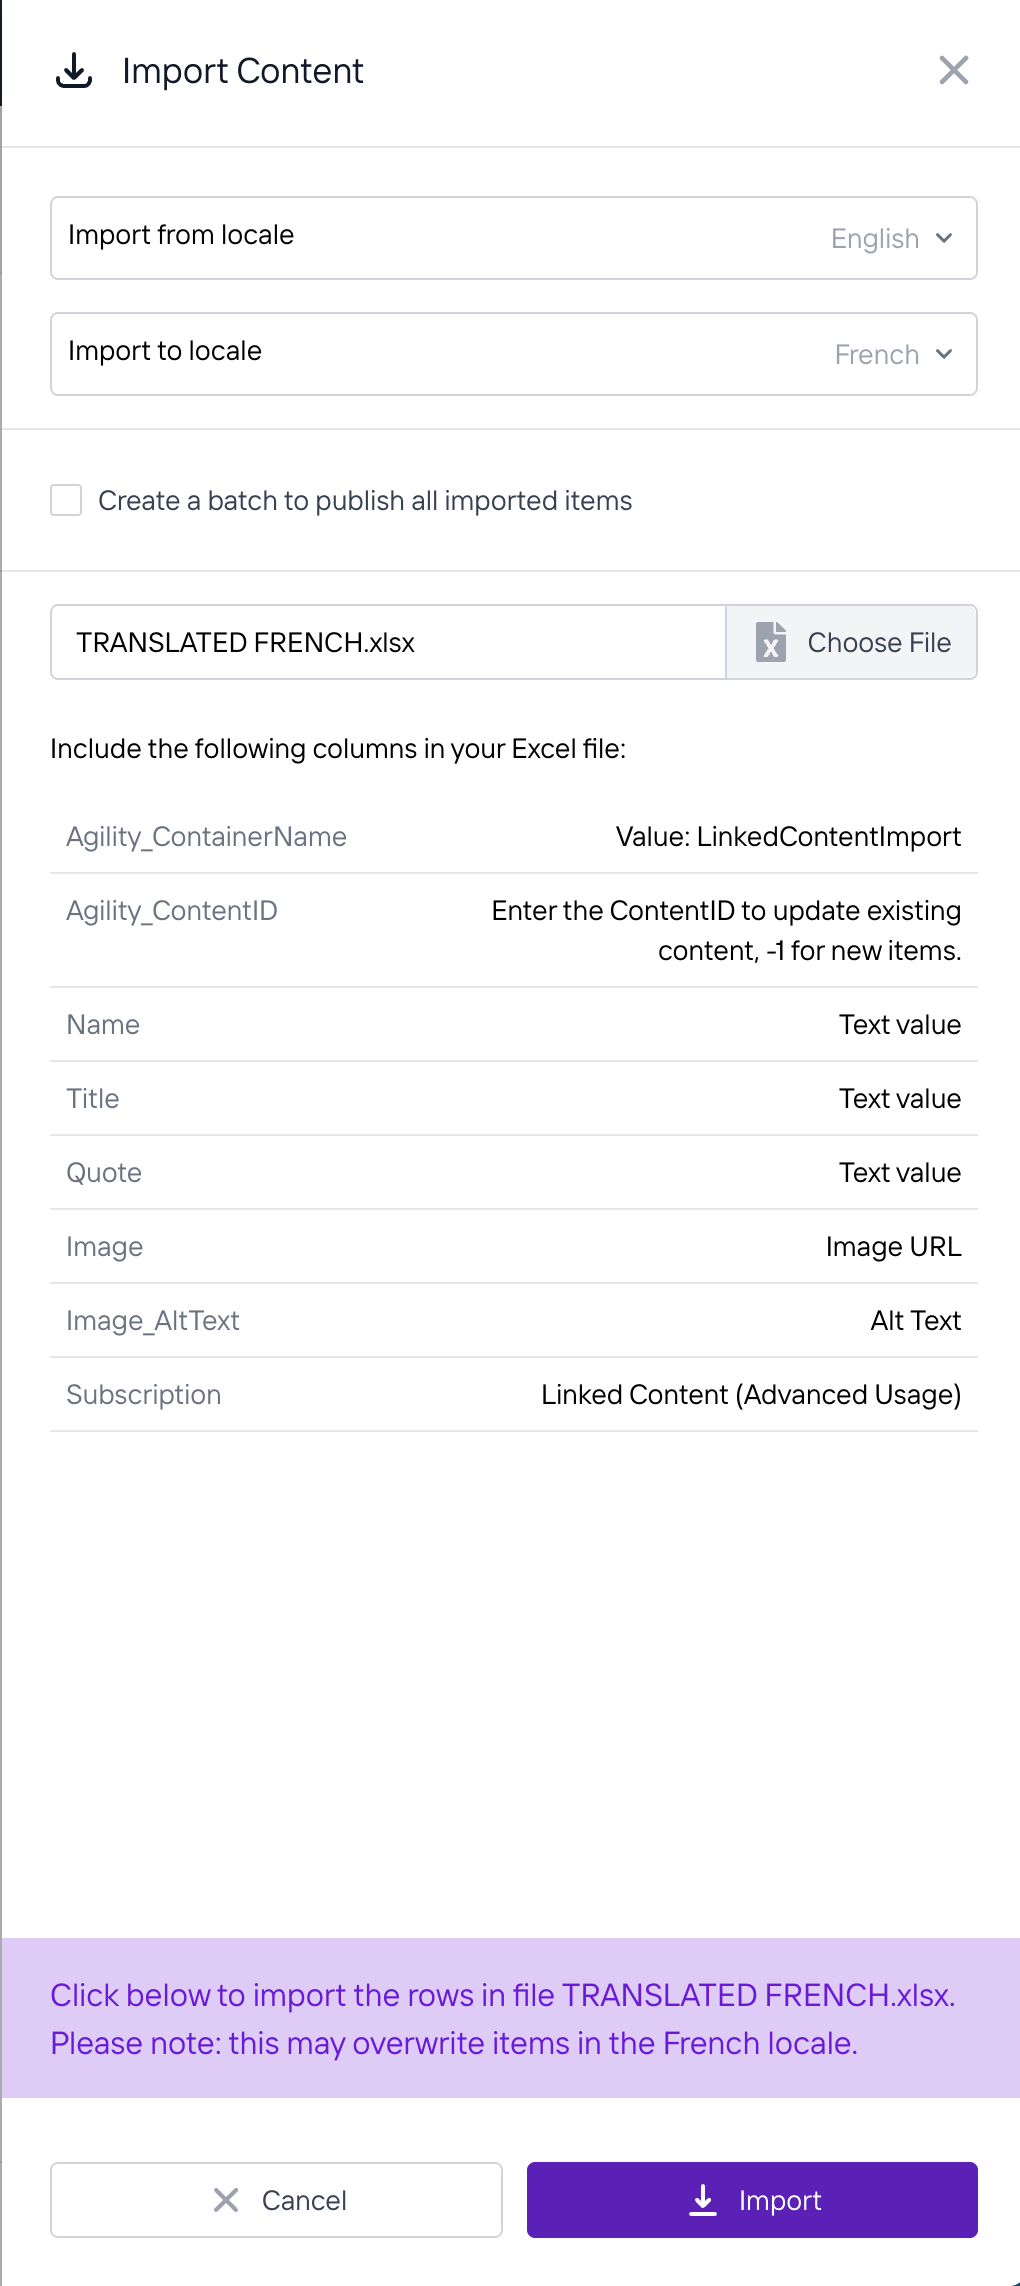
Two columns must remain intact for the import to work correctly:
- Agility_ContentID — Identifies existing items. Leave blank or set to
-1for new items. - Agility_ContainerName — References the target content list.
Do not modify column headers, Content IDs, or Container Names — field mapping is entirely driven by column headers, and changing them will break the import.
Import Steps
- Export your content list and make your edits in Excel.
- Save the file.
- In Agility CMS, click the 3-dot menu and select Import.
- Set the Import From (source locale) and Import To (target locale).
- Upload your file.
- Keep the browser window open until the import completes — imports run as a batch process, and closing the window early may interrupt it.
Note on dates: Excel does not share timezone information, so all dates and times should be listed in EST when importing.
Step-by-Step Guides
Guide A: Bulk Edit Content Within the Same Locale
Use case: You want to update or edit existing content in a locale without affecting any other locale.
- Navigate to the content list you want to edit.
- Click Export → Regular Format.
- Open the downloaded Excel file.
- Edit only the field columns you want to change (e.g., title, body text).
- Do not change: Content ID, Container Name, Version ID, or Language Code columns.
- Delete any rows you do not want to update (this will not delete them from the CMS).
- Save the file.
- Click Import.
- Set both Import From and Import To to the same locale (e.g., French → French).
- Upload your file and keep the browser window open until the import completes.
This will only affect the fields and rows included in your file. It will not touch other locales.
Guide B: Translate Content from One Language to Another
Use case: You have English content and want to create French (or other language) versions of it.
- Navigate to the content list in Agility CMS.
- Click Export → Translation Format. This produces a single-sheet Excel file with one row per field, per item.
- In the Translated Value column (the last column), enter your translations. You may send this file to a translation vendor — they fill in the translated column and return it.
- Do not edit the Item ID, Field Name, or source Field Value columns.
- Save the file with a clear name.
- Click Import.
- Set Import From to your source language (e.g., English) and Import To to your target language (e.g., French).
- Upload the translated file and keep the browser window open until complete.
The system will match items by Content ID and create linked versions in the target language, sharing the same ID as the originals. You can switch between locales in the CMS to see the same item in each language.
Common mistake: Do not translate the source value column in place and leave the Translated Value column blank. The system only reads the Translated Value column — if it's blank, nothing will import.
Using Excel's =TRANSLATE() Function to Fill the Translated Value Column
If you have access to Microsoft 365, you can use Excel's built-in =TRANSLATE() function to automatically populate the Translated Value column rather than translating manually or sending to a vendor.
Formula syntax:
=TRANSLATE(text, source_language, target_language)
Example — translating cell E2 from English to French:
Assuming your export has content in column E and your Translated Value column is the next available column, enter the following formula in F2:
=TRANSLATE(E2, "en", "fr")
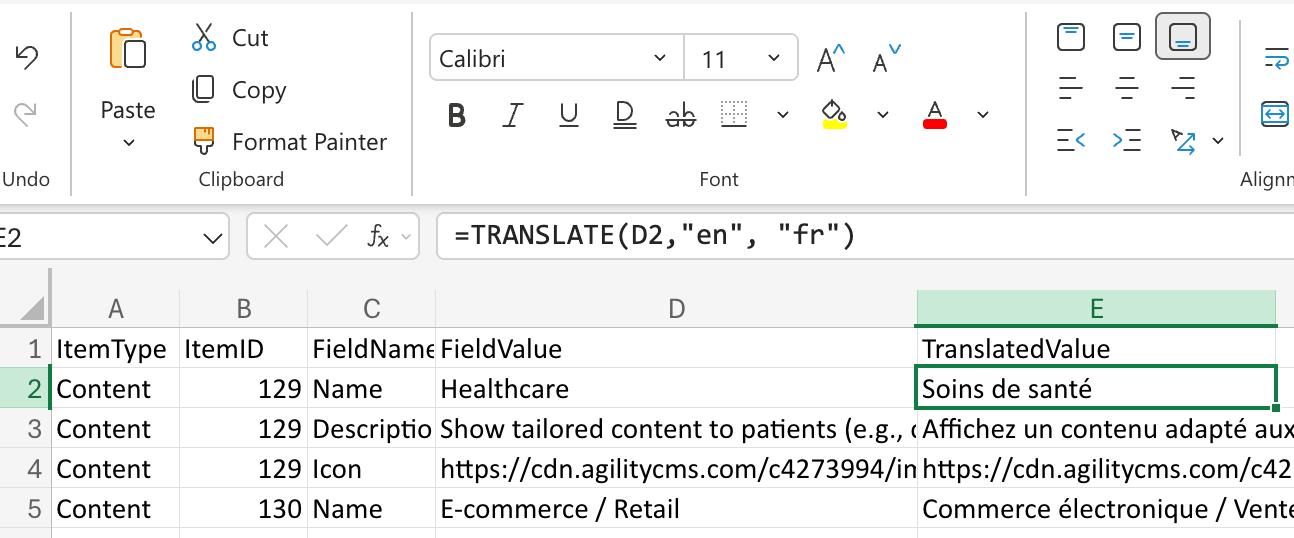
You can then drag this formula down to apply it to all rows in the sheet.
Before importing, convert formulas to values:
The Agility CMS importer reads cell values, not formulas. Before saving the file for import, copy the translated column(s), then paste as Values only (Paste Special → Values) to replace the formulas with plain text.
Note:
=TRANSLATE()requires a Microsoft 365 subscription and an internet connection. Results are machine-generated and may need review before use in production content.
Guide C: Replicate English Content Across Regional Locales
Use case: You have multiple regional English locales (e.g., en-US, en-GB, en-AU) and want to replicate or bulk-copy content from one to another.
- Navigate to the content list in your source English locale (e.g., en-US).
- Click Export → Regular Format.
- Open the Excel file. Each sheet represents one content model (e.g., Posts, FAQ Items).
- Edit content as needed for the target region (e.g., change "color" to "colour" for en-GB).
- Delete any rows you do not want to import.
- Do not change: Content IDs, Container Names, or column headers.
- Save the file.
- Click Import.
- Set Import From to your source locale (e.g., en-US) and Import To to your target locale (e.g., en-GB).
- Upload the file and keep the browser window open until complete.
- Repeat steps 8–10 for each additional target locale.
All target locales share the same field structure, so no mapping changes are needed.
Tip: If you only want to work with a small test batch, create a temporary test list in the CMS, copy a few items there, export just that list, and delete the test list when done.
Guide D: Creating New Content Items via Import
Use case: You want to bulk-create new content items in a locale.
- Export an existing list in Regular Format to use as a template.
- In the Excel file, copy an existing row as a template for your new item.
- Set the Content ID column value to -1 for any new item you want to create.
- Fill in all required field columns for the new item.
- Delete the rows of existing items you don't want to modify.
- Save the file.
- Click Import and select the target locale.
The system will create a brand new item for every row with a Content ID of
-1. If you later want to add a translation of a newly created item, first export the item in its original locale to get its real Content ID, then follow Guide B.
Guide E: Bulk Publishing Imported Content
Use case: You want to review and publish all imported items at once rather than one by one.
- When running your import, check the Add to Batch checkbox before uploading.
- Complete the import as normal.
- After import, go to Settings → Batches (or the Batches report).
- Find the batch created by your import.
- Review the items in the batch.
- Click to publish all items in the batch at once.
This is especially useful when doing large locale migrations where you want to stage content before going live.
Child Content Import
The system supports importing content with linked child content. When exporting in Regular Format, each content model gets its own worksheet — nested content appears as a separate sheet. When exporting in Translation Format, everything comes as one long sheet with each field of each item as a separate row.
The nested content reference field is included in the export but should not be edited. The import handles all sheets together — you do not need to run separate imports per sheet.
Steps for editing nested content:
- Export the parent list in Regular Format.
- Open the Excel file — you will see multiple sheets (one per model).
- Edit field values in each sheet as needed.
- Do not edit Container Name or Content ID columns.
- Do not edit the nested content reference field on the parent sheet.
- Save and re-import normally.
Technical Limitations & Considerations
- Entire list always exports — you cannot select specific rows to export. Workaround: delete unwanted rows from the Excel file before re-importing (this does not delete them from the database).
- Keep the window open — imports and exports run as a batch process. If you close the window before it completes, the process may be interrupted.
- Large datasets take time — imports take significantly longer than exports. For lists with 7,000+ items plus nested content, plan accordingly.
- One locale per import — you must run a separate import for each target locale.
- Translation Format is text fields only — it does not include dates, URLs, or non-text fields.
- Do not modify column headers — field mapping is driven entirely by column headers.
- Assets — image fields export as two columns: image URL and alt text. Images are not transferred as files.
The Import and Export tool is great for getting bulk data into and out of the Content (area) and Pages (area). It allows for content to be exported and re-imported easily and reliably.
Exporting Content
There are two types of formats that you can export: Regular and Translation.
Regular Format
This format will display all your exported website data content where each content type is represented on different Excel Worksheets, similar to database tables.
Translation Format
This format will allow you to easily make translation changes to your copy.
To export content, click on the Export Button:
Select an Image
Select your Format:
Select an Image
If exporting for Translation, the TranslatedValue column is where you can enter your copy in a different language, eg. FR. You can then import the formatted excel document into Agility with the newly, translated values.
Importing Content
To begin Importing Content, first export the Content List you would like to work on.
Using your Export, update/enter any new content you would like to add.
NoteThe Agility_ContentID and Agility_ContainerName columns are required for import.
Agility_ContentID - This is the ContentID of an existing item. If you are importing new items, the value can be blank.
Agility_ContainerName - This is the reference name of the list to import into.
Once you have saved your Import and its changes, click on the Import Button:
Select an Image
Select your Import From Language and the Import To Language.
Import From
This is the original language from which you are importing from.
Import To
This is the language where you are you Importing into.
Choose your file, then click Import:
Select an Image
Importing Content that contains Child Content
Agility offers you the ability to import and export content via Excel, however, it is also important to note that you are also able to import and export child content. Let’s look at how this can be done.
As an example, here is a list of Properties (Content List), that can contain Linked Content to another Content List named Spaces
Select an Image
Under Shared Content, I created 3 new Properties in our Property list:
Select an Image
However, I did not add any Spaces to any of the Properties yet, I'll export these Properties to an Excel file, add Spaces to our Properties, then import back the Excel file.
Click on Export, export for Regular Format, then download the file. When we open the Excel file, we’ll see the information about our Properties:
Select an Image
Some important values to note here would be the ones in our “Spaces” column. This is the Reference Name for our Linked Content and we will use these to attach the Spaces to Properties (i.e. Spaces for the Agility Large Property will use Properties_Spaces and Spaces for the Agility Small Property will use Properties_Spaces39).
We can add a new sheet to this Excel file named “Spaces” and fill out some important information we’ll need to be able to import these spaces and link them to its respective Property:
Select an Image
Agility_ContentID & Agility_VersionID: These do not require values as Agility will populate these upon import.
Agility_LanguageCode: Required Field.
Agility_State: May be set to Staging or Published depending on your use case.
Agility_ContainerName: This will be relating to the important values or “Reference Names” we mentioned earlier:
- To add Spaces to the Agility Large Property, we’ll use Properties_Spaces
- To add Spaces to the Agility Medium Property, we’ll use Properties_Spaces38
- To add Spaces to the Agility Medium Property, we’ll use Properties_Spaces38
Title: This is just a Text Field set up to describe the Space and will be different depending on your use case.
We can save our Properties & Spaces sheets, export it, and head back into the Agility dashboard to import our new data. Head to Properties under Shared Content and import our updated Excel file.
Select an Image
Once complete we can select a Property from our list and see the new Spaces we’ve created and imported:
Select an Image